This blog post is about the standard costing functionality of Dynamics 365 for Finance and Operations (D365FO) which applies to direct labor costs. This functionality can be beneficial for labor-intensive companies as it allows for strict control of the cost for direct labor employees. By following this guide, you’ll understand the key point about standard direct labor cost setup in D365FO.
This post is also applicable for Dynamics AX 2012.
In case you’re not familiar with standard costing at all, please take a look at Standard costing. Or how to control costs of production first.
The guide regarding standard direct material costs can be found here.
In order to follow this guide, you need to be familiar with D365FO production control functionality.
Standard Costing Example
I use an example to demonstrate how to calculate the standard direct labor cost and variances. Imagine a company that produces apple juice. A team of three people is required to operate the extraction machine. The company hires hourly paid workers to fill the open positions.
The company established the following standard cost:
The company splits all workers by two classes and sets hourly rates for each class:
-> the cost of class II is $30
-> the cost of class I is $20The normal working day is 8 hours and the company expects to produce 5,000 liters of juice per day.
It is expected that 2 workers of class II and 1 worker of class I will be involved in production.
The total labor cost per 5,000 liters can be calculated:
8 hours * (2 worker * $30 per hour + 1 worker * $20 per hours) = $640
The actual data I’m going to enter into the system:
Time spent for production: 9 hours
Labor involved: 3 people class II
Actual yield: 4,600 liters
As a result, we have the total direct labor variance:
Allowed cost = Cost of standard yield / Standard yield * Actual yield
$640 / 5,000 liters * 4,600 liters = $588.80Actual cost = Qty of workers * Hours worked * Rate
3 workers * 9 hours * $30 = $810Total direct labor variance = Actual cost – Allowed cost
$810 – $588.80 = $221.20 (unfavorable)
Below I show how the total direct labor variance can be divided into split between the direct labor efficiency variance and the direct labor rate variance:
The direct labor efficiency variance = (Actual hours – Allowed hours) * Standard rate
Allowed hours = Standard hours / Standard yield * Actual yield
8 hours / 5,000 liters * 4,600 liters = 7.36 hoursWorker 1 and 2: (9 hours – 7.36 hours) * $30 = $49.20
Worker 3: (9 hours – 7.36 hours) * $20 = $32.80
Total direct labor efficiency variance = $49.20 *2 workers + $32.80 = $131.20Direct labor rate variance = (Actual rate – Standard rate) * Actual hours worked
Worker 1 and 2: ($30 – $30) * 9 hours = 0
Worker 3: ($30 – $20) * 9 hours = $90
D365FO has the functionality to manage direct cost calculations. Below, I show you how the functionality can be set up and when calculations are performed.
Please note, this guide just provides an example of how the functionality can be set up. I don’t cover Time and Attendance (T&A) and Manufacturing Execution (MES) functionalities which are available in D365FO and can complement the standard costing functionality. More information about T&A/MES functionality can be found here.
1. Basic parameters
1.a. The “Cost breakdown” and “Variances to standard” parameters must be set up properly. These parameters influence how the variances will be calculated and posted to the ledger. To calculate the variances in detail, set the parameters as shown on the image below.
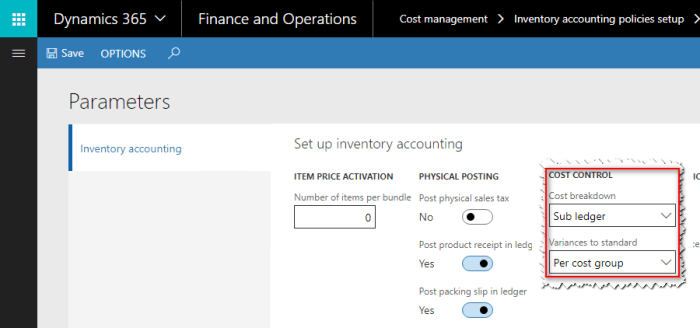
For details about these parameters please have a look here.
1.b. To make things work you need to set up ledger accounts for the variances.
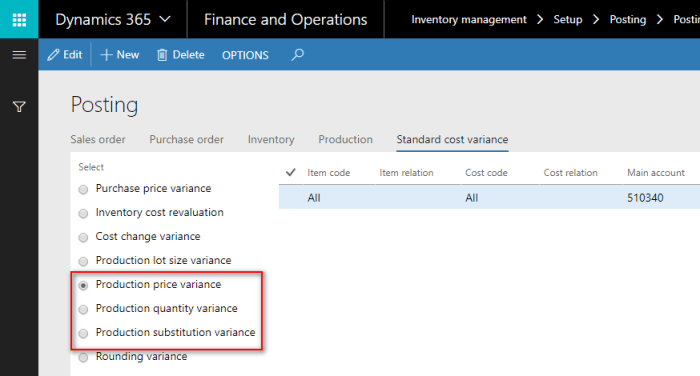
More information about the variances can be found here.
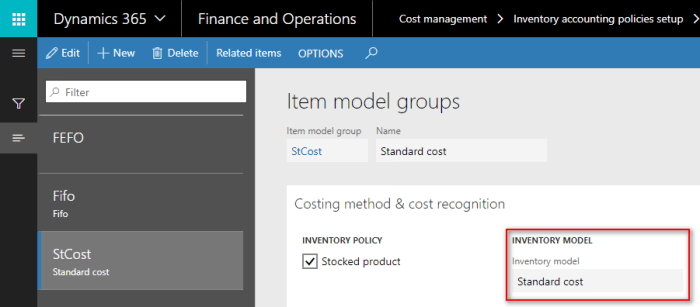
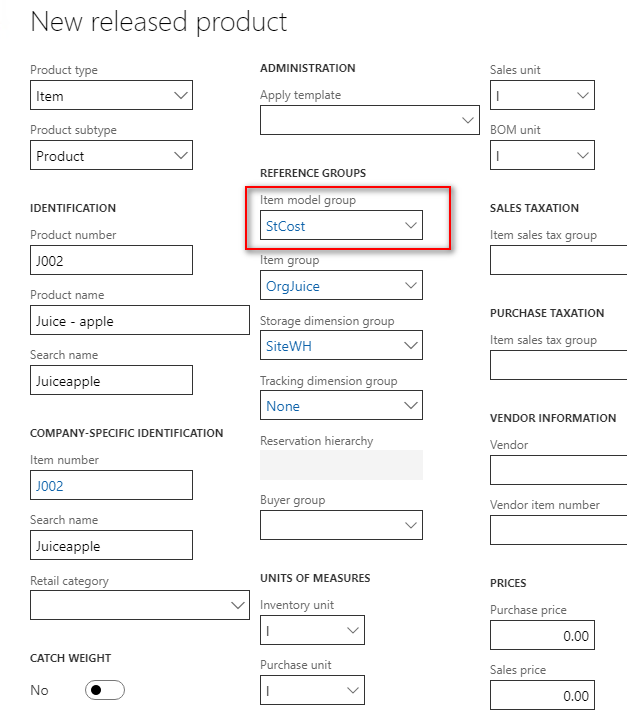
1.c. An item model group with the “Standard cost” inventory model is needed. This group is going to be used for finished goods.
1.d. What you also need is a costing version with the “Standard cost” type. If you don’t have one, then set it up.
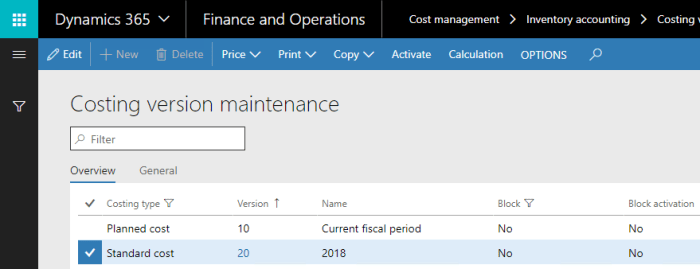
More details about costing versions can be found here.
1.e. According to the example we follow, I created two shared categories and cost categories, one for each labor class. Also, I linked cost categories to the cost group. Here is the example in the image below.

More details about cost categories can be found here.
1.f. In order to set up a route, we need to create operations first. I created three operations for the three employees involved in the process.
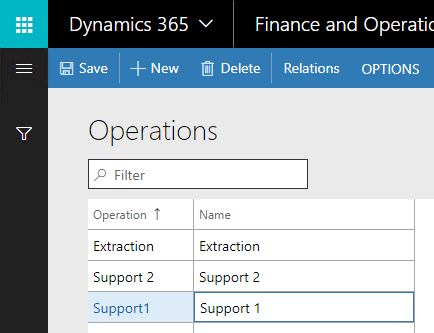
Details about operations are here.
1.g. Next, we set parameters, which affect the cost calculation and the route/job card creation for the route. These parameters must be specified on the “Route groups” page. The route group is linked to the exact operation relation. I prepared a special route group for the example we are following.

I activated runtime for estimating and costing in order to include the cost of labor in the calculation. Automatic route consumption for the runtime is needed for creating a route card automatically.
1.h. The last elements are resources. We’ll link them to the operations later. I’m going to use three human resources.
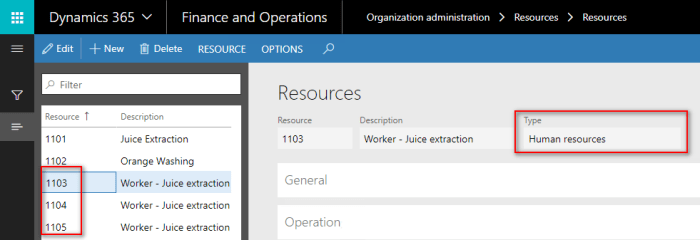
Each resource must be linked to a resource group and a calendar must be specified there. If a calendar is not specified, the scheduling won’t be possible. The system will show the message “Production order ***** could not be scheduled. Not enough capacity could be found.”
Details about resources are here.
2. Finished goods and route
2.a. We need a finished goods product where a standard cost item model group is specified. We prepared a standard cost item model group at Step 1.c.
Don’t forget to set the production type of the product as “Formula” or “BOM”.
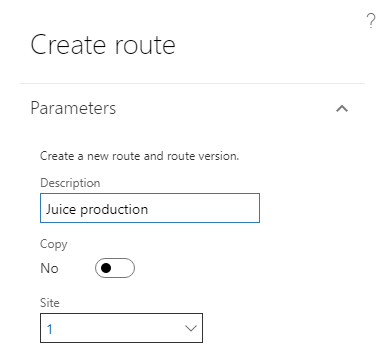
2.b. Everything is ready to create a route and link it to the product. As we know, a route is a list of operations that must be performed to produce a product. In its turn, the operations consume resources. In our case, it’s human resources.
To create a route, go to the route form by clicking the “Engineer / Route” button on the “Released products” page. You can use the “New / Route and route version” button there.
2.c. Now let’s add the main operation to the route (we defined operations at Step 1.f.) and fill operation relations specifically for the route and our finished goods. In accordance with the example, I set the runtime for 8 hours, processed quantity 5,000 liters, and chose the route category we created in Step 1.e.
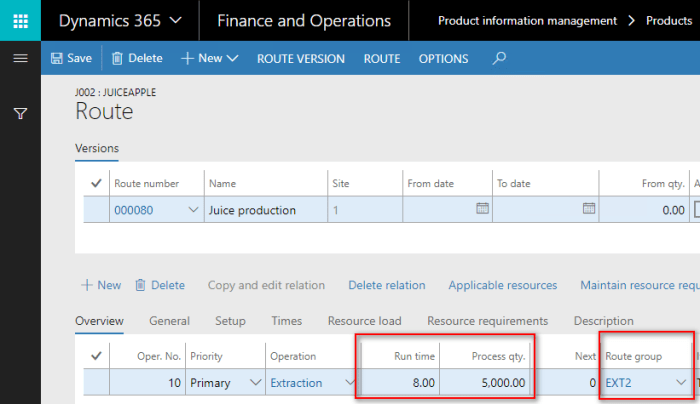
Next, let’s link a category, which will be used as a standard rate for cost calculation.

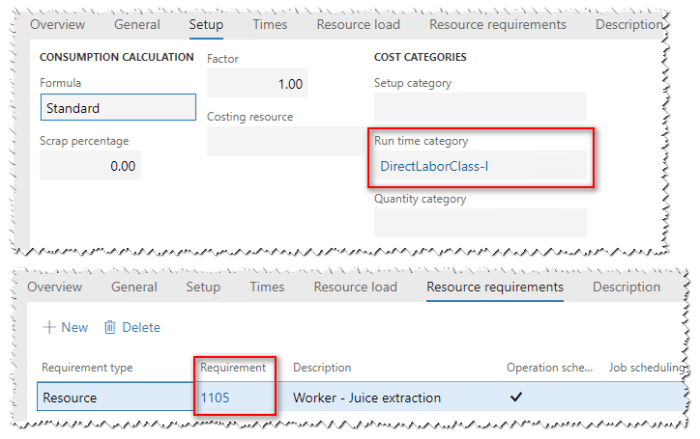
And finally, it’s necessary to set up resource requirements. The image below illustrates how I’ve done it.

Details about operation relations can be found here.
2.d. Now let’s add an additional two operations for the other two workers. In this case, I used secondary operations to the primary one we already created.

2.e. For each support operation, it’s necessary to set up run category in accordance with the rate that’s going to be used for calculations. Also, I set resources, which are used by the operations. The settings for the second operation are shown on the image below.

To follow our example, I set the “DirectLaborClass-I” runtime category for the third operation of the route.
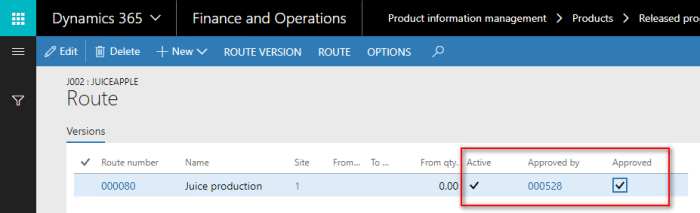
2.f. It’s time to approve and activate the route we created. Please use the appropriate buttons on the “Route” page to perform this operation.
2.g. Let’s calculate the standard cost. But to do that, a Bill of Materials (BOM) or formula must be already set up in the system.
The calculation I have is illustrated in the image below.
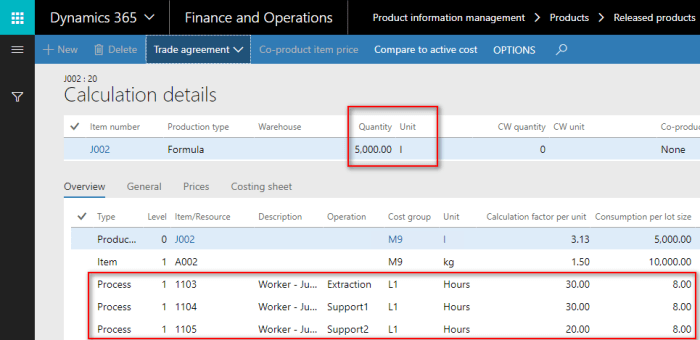
The system calculates the variances against the resources linked to the calculation. There are 1103, 1104, and 1105 show in the image above. In the event that the resource is changed in the route card, the system calculates the substitution variance. That should be taken into account when the groups are used instead of exact resources in the route (the steps 2.c and 2.e of this guide).
Don’t forget to activate the cost.
Details about cost calculations are here.
3. Production run and variances
3.a. It’s time to create the batch and start it. Make sure that you create and don’t post a route card while starting the production. Go to the route card and you can change the hours and the category of the worker there. Aslo, you can set the quantity produced. In the image below, you can see the changes I made on the route card.
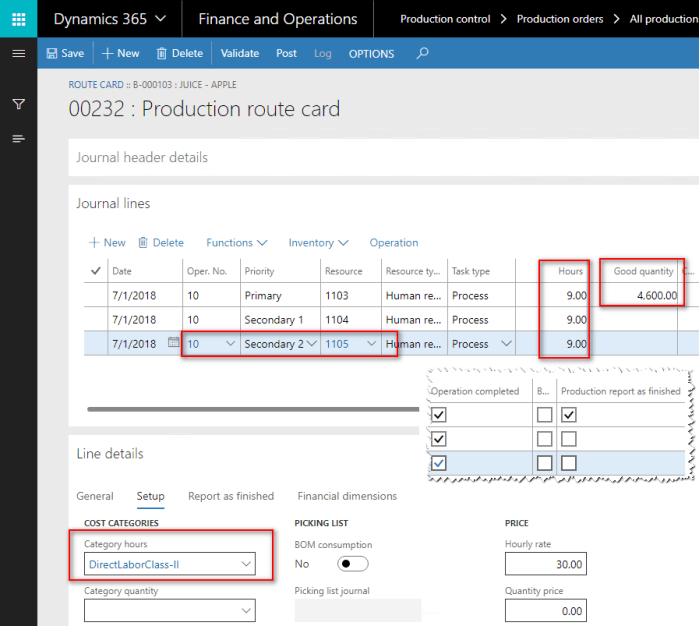
Don’t forget to post the route card.
3.b. Now the batch order must be ended. As a result, the system calculates the variances.
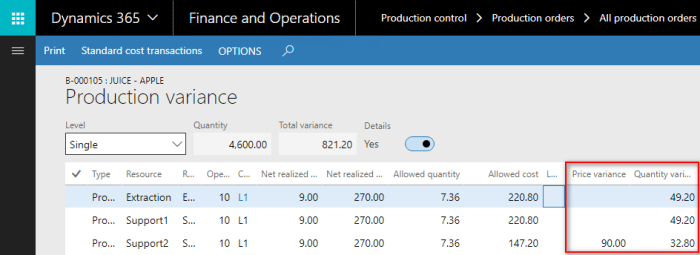
Worker 1 and 2:
Price variance = ($30 – $30) * 9 hours = 0
Quantity variance = (9 hours – 8 hours / 5,000 liters * 4,600 liters) * $30 = $49.20Worker 3:
Price variance = ($30 – $20) * 9 hours = $90
Quantity variance = (9 hours – 8 hours / 5,000 liters * 4,600 liters) * $20 = $32.80
This blog post covers the most general setup available. D365FO is very flexible and many variations in the settings are possible. If you use direct labor standard costing in your company, please contribute to the great AX community and share your experience in comments. It’s very valuable to know about the different practical examples of using this functionality.

One thought on “Standard direct labor cost in Dynamics 365 for Finance and Operations”